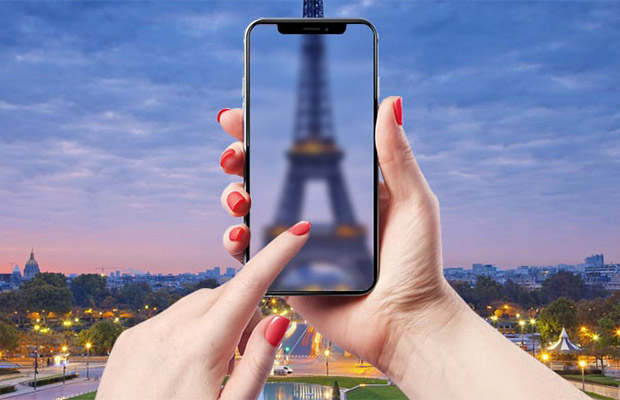
When you open the Camera app to take a picture, nothing appears to be clear. Then you may wonder: why is my camera blurry? In this article, I’ll explain what to do when your iPhone camera is blurry!
A short while ago, the best anyone could hope for was blurry phone camera pictures. Everyone now demands images that are as clear as those captured by a dedicated digital camera.
The blurry pictures your phone is suddenly taking may have you scratching your head, or you may simply be unable to get the focus to be accurate in the viewfinder before you take a hilarious photo of your cat for social media.
For more information on the causes of this issue and simple solutions, keep reading.
Table of Contents
Why is My Camera Taking Blurry Photos?
The most common issues with a phone camera are blurry photos, issues focusing the camera, or specks on the screen.
For many phones, tapping the screen is necessary to precisely focus on the desired area of the image. Please make sure that the area you want to focus on is the one you are tapping.
Please remember that most smartphone cameras lack macro (very close up) capabilities and may have difficulty focusing on objects that are very close to the phone.
Dust is a common reason for specks. Please make sure this is the case by carefully inspecting your camera’s lens. By shaking the phone, this will also be easily removed.
Please be aware that your warranty may be impacted if dust entered the unit as a result of an unauthorized repair or opening of the phone.
There may be a variety of causes for the camera blur. But mainly six reasons are listed below:
- Dust or Vapor.
- A blur could be produced by autofocus.
- Camera Settings.
- The issue may frequently be with the app.
- cellular covers or cases.
- The lens acquired dust.
Let’s quickly get to the answers.
How to Fix a Blurry Camera?
Try below 15 methods:
1. Clean Your Camera Lens
The most obvious cause of blurry photos taken with a phone camera is a dirty lens. In addition to directly causing blur or distortion, dirt on the lens can also prevent your phone’s autofocus system from working properly.
To clean your lenses, use a fresh microfiber cloth designed for eyeglasses or camera lenses. The outer camera lens glass on your phone might have a coating that reacts poorly to certain chemicals, so avoid spraying any cleaning solution on the lens or cloth.
If your phone is water-resistant, you might want to gently rinse the glass of the outer camera lens with some clean, fresh water to get rid of any mineral buildup, such as tiny sand particles. Even though the outer camera lens glass in modern cameras is made of hard, durable materials like sapphire, hard minerals trapped between your cloth and the glass can still scratch it.
2. Use the Correct Mode
There are probably a variety of shooting modes in your camera app. It might be impossible to get your subject in focus for a typical shot if you unintentionally turned on a special mode, such as Portrait or Macro Mode. Alternatively, if your subject is too close to the camera for it to focus, you might need to activate one of these modes, like macro mode.
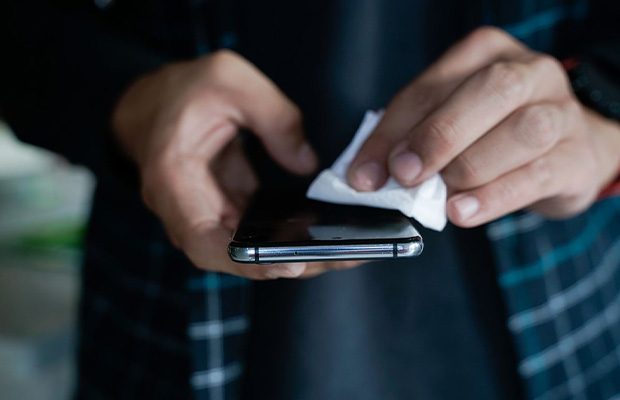
3. Clean Your Screen
To rule out a layer of grease on your phone’s screen causing the image to be fuzzy, give it a thorough wipe with a clean microfiber cloth.
4. Take the Protective Film Or Screen Protector Off
Let’s start with something that might sound a little silly: if the image in your app’s viewfinder is a little bit fuzzy, it’s possible that something on your screen is distorting the image.
Make sure you have removed the protective film from the phone’s screen if you have just taken it out of the box. Read the quick-start guide thoroughly because some smartphones, like the Samsung Galaxy S21 Ultra, have a screen protector installed from the factory that shouldn’t be removed unless it is damaged.
Some screen protectors reduce the clarity of your display, giving the impression that everything is hazy. By opening a non-camera app and looking at screen elements like text, you can quickly verify this. Consider removing the screen protector or switching to one with a higher clarity rating if everything on the screen seems a little bit mushy.
5. Take Off Your Phone Case
Most phone cases have sufficient cutouts for the cameras, but some models might have too much overlap, especially if you use your phone’s widest-angle camera. Even if it doesn’t partially cover any lens, cases for phones that use special sensors to measure distance for focus may partially cover that sensor.
While unlikely, it’s a good idea to remove your case right away and take a few test photos to rule out the possibility if you think your case is the problem.
6. Tap for Focus
Your phone’s autofocus feature can make mistakes from time to time. In most cases, this can be fixed by tapping on the object in the camera app’s viewfinder that you want to focus on.
Since Android phone camera apps are not standardized, the precise focus adjustment method may vary from one brand of phone to the next. On the iPhone camera app, you can tap anywhere in the frame to shift focus. You can find instructions in the camera app’s help file if tapping to focus doesn’t appear to work on your Android device.
7. Check the Lens for Condensation
Condensation between the lens and outer camera glass may form on your phone if it has been exposed to moisture or an environment with a high humidity level. Air must still pass through the camera even though it may be sealed against liquid entry in order to balance the pressure inside the camera assembly with the outside atmosphere. Because of this, if you use the phone in environments more akin to the Amazon jungle than a comfortable humidity level, liquid may condense onto the inside of the glass.
You can only wait for the condensation to evaporate if it appears inside the camera. To hasten this process, maintain the phone at room temperature and with typical humidity levels. You’ll need to have your phone evaluated by a professional if the issue persists or keeps coming back. Your phone may have water damage.
8. Switch to a Different Camera
Multiple independent cameras are present on the majority of modern smartphones. Consider using a camera with a different focal length if your image is blurry. Sometimes switching to a different camera and then switching back can fix whatever momentary glitch is causing problems, even if you are on the right camera for the shot you want to take. Due to its higher megapixel image sensor, the main camera typically has the best clarity.
You can also try switching to the selfie camera and then returning to the rear cameras if all of your back cameras are blurry or if switching between them doesn’t resolve the issue with one of them. Some users have told us that this has been helpful to them.
9. Use Manual Mode
Your camera app is largely automated by default. You only need to be concerned about framing and timing your shot if you’re taking a picture of a subject that the autofocus feature can’t properly handle. It tries to choose the best focus and exposure settings for you.
Some Android phone camera apps come with a manual or “Pro” mode, making it more like operating a Using the on-screen focus wheel on a Samsung Galaxy phone, for instance, you can choose Pro mode and manually adjust your camera settings.
While it’s worth checking out our camera settings guide, here are some quick and dirty thing you can do in manual mode to eliminate blur and fuzz:
- Use a quick shutter speed to lessen motion blur.
- In low light conditions, increase the ISO.
The areas of the image that are in focus will be highlighted in a color in many manual modes, letting you know that the proper objects are in focus.
10. Try a Third-party Camera App
Unfortunately, neither the Apple default app nor some Android phone manufacturers offer a similar manual mode for iPhone users. Use a third-party camera app to enable manual camera control; this is your best bet.
ProCamera is a camera app for the iPhone, but it is $15, so be aware of that. At almost half the cost, Camera+ is a good replacement. Our recommendation for the best Android app is Camera FV-5, which costs $4.99. There are many Android camera apps to choose from, but some Android phones don’t work well with this one. As a result, you should either test it during Google Play’s refund window or try the FV-5 Lite app first.
11. Force Close the App Or Restart Your Phone
Compared to the firmware in a dedicated camera, smartphone camera apps aren’t quite as dependable. The reason being that a smartphone has a large number of processes running at once, and new or discovered software bugs are frequently found. If your camera app simply won’t focus on anything, there may only be a short-term issue with the app.
Force closing the app should be done first. To display the app carousel on iOS, swipe up from the bottom of the screen to the middle. Once you see your camera app, swipe it upward to close it by moving your finger left or right.
The app carousel on Android can be accessed by pressing the Android system button (three vertical lines) in the far left corner. The camera app can be accessed by swiping left or right; to close it, swipe it up and off the screen.
Restart your phone entirely and try again if closing and opening the app again doesn’t work.
12. Check for Camera App Updates
It’s worth seeing if the app has an updated version available for download if a bug is the root of your camera focus issues. Updates to camera applications may come either separately or as part of a significant operating system update.
It is more likely that nothing is physically wrong with your camera if it functions properly with a third-party app but not with the default app.
13. Slap Your Phone Against Your Palm
The final piece of advice may seem strange, but slapping your phone against your palm can sometimes fix camera issues. This is due to the fact that the camera assembly contains tiny moving parts that may become stuck in one location, preventing the camera from changing focus.
Slap the back of your phone against the heel of your palm while your camera is on, firmly but gently. Hopefully, this will return the electromechanical parts to their proper positions.
14. Restart Your iPhone
Try restarting your iPhone if closing the application didn’t resolve the issue. A different app may have crashed or your iPhone may be experiencing a minor software issue if the camera on your phone is blurry.
If you have an iPhone 8 or older model iPhone, press and hold the power button until “slide to power off” appears on the display. If you have an iPhone X, press and hold the side button and either volume button until “slide to power off” appears.
15. Send Your Phone for Assessment
It might be time to have a professional examine your phone’s camera if you’ve tried everything on this list and are still only getting hazy images because the camera module itself may need to be replaced.
Read More: How to Unblur a Video?
Hope You Can See Clearly Now!
Now that the iPhone camera is fixed, you can keep taking stunning pictures!
These actions have already been tried by many people, including myself, and you ought to give them a shot.
I sincerely hope you’ll share this article on social media with a friend who might be interested in finding out how to fix a blurry iPhone camera.
Please leave a comment below if you have any additional queries. Thanks for reading!
You May Also Like:
FAQs
Why is My Camera Lens Blurry?
If your camera lens is blurry, chances are there’s dust inside the lens or the lens of the camera being scratched. It can be fixed by clearing the camera lens using a thinner cotton ball. Additionally, get the camera lens fixed by going to the neighborhood repair shop. Generally speaking, general problems like not cleaning the phone or a malfunctioning autofocus are to blame for camera blur.
Why is My Front Camera Blurry Android?
If the front camera on an Android device is blurry, there is likely sweat on the lens, which sticks to the lens when we use the device for extended periods of time. The following simple steps can be used to fix it.
Why is My Camera Blurry on Snapchat?
Perhaps your grainy and blurry camera quality on Snapchat is the result of such a bug. You can completely free up RAM and memory on your iPhone by killing the Snapchat process. By doing this, you’ll stop the ongoing bug that’s affecting your photos as well!
Why is My Camera Blurry on Zoom?
The main cause is due to poor lighting when using Zoom. Additionally, it might be that your camera lens is dirty or that your internet connection is being throttled as a result of background apps consuming too much bandwidth.