Are you wondering how to blur a photo on iPhone? Although it may seem challenging, the tips you’re about to learn to make it simple to create gorgeously blurred backgrounds.
The Camera app on most recent iPhones comes with Portrait mode, which allows you to blur a photo as you’re taking it.
See below 5 easy ways to blur the background in an iPhone photo.
Table of Contents
How To Blur A Photo On Your iPhone?
1. Blur Background On Your iPhone Using Portrait Mode
Most iPhones make it simple to blur the background of your photo for an artistic, professional-looking portrait thanks to the Portrait mode in the Camera app. The second generation of the iPhone SE and later models, as well as the majority of iPhone 8 Plus and newer models, all come with this feature.
- 1. Start the Camera app and tap Portrait at the bottom of the screen.
- 2. Compose your photo.
- 3. Before you take the shot, tap the f icon at the top right. An f stop slider should appear at the bottom of the screen.
- 4. To select the desired background blur, slide the slider. The blur will be more obvious the smaller the number, so an f2.0 lens will produce a blurrier background than an f16 one.
- 5. Take the picture once you’re satisfied.
Quick tip: After the picture is taken, you can still change the blur. Open a portrait-oriented photo in the Photos app, select Edit, and then press the top-left f button. For a different blur effect, move the slider.
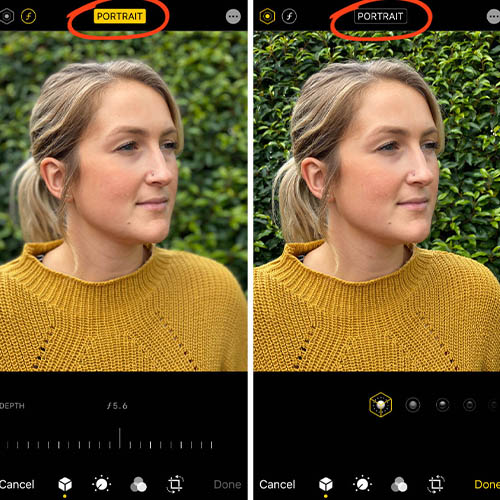
2. Change Background Blur In Portrait Photos On iPhone
Even after taking a portrait photo, iPhones allow you to adjust the background blur. Thus, the Photos app can help you easily edit your photos, whether you want to use a different lighting effect or make your portrait shots look even more appealing.
1. First, open the Photos app on your iPhone and head to the portrait photo you wish to edit. After that, tap “Edit” in the upper-right corner of the screen.
2. Now, tap on the f/number icon at the top-left and use the “Depth control” slider that appears below your photo to adjust the blur strength. On iPhone, a low number increases the blur effect while a high number reduces it.
3. On the other hand, Portrait Lighting enables you to add various studio lighting effects to your portrait photographs (supported on iPhone 8 Plus, iPhone X, and later). Tap the “Portrait Lighting” icon (looks like a hexagon) at the top left corner of the screen and then choose the desired lighting effect.
- Natural Light: It enables you to use natural lighting effects for portrait photography, as the name would imply. If you want a real-world photograph and don’t want the camera to alter the lighting, pick this option.
- Studio Light: It enables you to make your subject’s face look happier.
- Contour Light: Apply shadows with it to give your facial features more definition.
- Stage Light: While keeping the entire focus on the subject, it completely blacks out the background.
- Stage Light Mono: Although it is essentially the same as Stage Light, it gives your portrait photos a black and white effect.
- High-Key Mono: It produces a white-background, black-and-white image that is ideal for use on government documents and identification cards.
4. Once you have ideally adjusted the portrait blur effect, tap the “Done” button at the bottom-right corner of the screen to save all these changes. Later, if you ever want to revert the changes, navigate to the image -> Edit -> Revert -> Revert to Original.
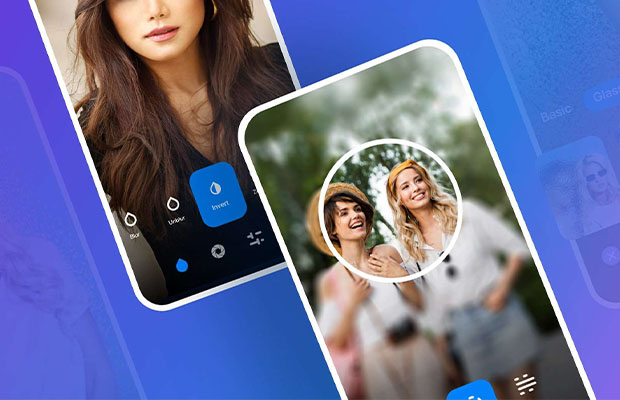
3. Use A Third-party App To Blur Photo Background On iPhone
On an iPhone, you can blur the background of a picture using a variety of third-party apps. However, because it can create professional-level bokeh effects, Focos is one of the most well-liked and effective apps. It allows you to adjust the depth of field in any image to create one that looks like it was taken in portrait mode. It requires iOS 11.2 or later and is free to download.
1. Launch the Focos app on your iPhone. When you’re ready to edit an image, tap the photo icon. Then, use the blur effect slider to adjust the background blur of the iPhone photo.
2. When you are happy with the results, tap the export button at the top-right and save or share your photo, as per your needs.
4. Blur Background By Getting Closer To Your Subject
What if you don’t have a modern iPhone but still want to blur a picture on your iPhone? Not to worry, there is an outdated but still useful tip that will enable you to blur the background of an iPhone image.
Simply move closer to your subject to make the background less visible. Yes, you did read that correctly. The built-in camera produces a shallow depth of field when you take a photo of a subject while it is in close proximity to the camera. For those who are not familiar, a shallow depth of field blurs the majority of an image while only allowing a small portion of it to be in focus. Simply put, the depth of field gets shallower the closer you position the iPhone camera to your subject. For fewer jitters and steadier photos and videos, we advise you to purchase one of the top iPhone tripods.
However, keep in mind that the camera will completely lose focus if you position it too close to the subject. The object will appear completely obscured. As you get closer to the subject, keep an eye on it to make sure it is sharply focused. Make sure to maintain a blurred background and a sharp foreground subject. The iPhone camera’s focus can thankfully be adjusted fairly quickly.
- Open the Camera app and tap on the spot where you want to focus on the subject. Now, a yellow box will show up on the screen to indicate the focus point.
- If the background doesn’t appear to be blurred, move a little closer and tap to refocus.
Note:
- To allow you to take incredibly close-up pictures, Apple has added a macro mode to the iPhone 13 Pro and 13 Pro Max. Its ability to capture images and videos of objects up to 2 cm away from your iPhone’s camera lens makes it a worthwhile addition.
- This camera mode allows you to take photos with enhanced focus and rich details of textures, flowers, insects, or really anything small or up close.
- Open the Camera app, make sure that the Photo mode is turned on, and then position the camera so that it is directly above your subject. Then, get closer to your subject—which can be as close as 2 cm from the lens—by moving in closer. You need to enable the new “Macro Control” option to click close-up photos. Pressing the shutter button will take the picture once the lens has focused on the target.
5. Use Blurred Vignette Effect To Bring Your Subjects In Focus
The blurred vignette effect is something you should try out to see if you like it, even though it can’t help you get the same result as the methods previously described. Are you curious how the vignette effect operates? As a result, a blurred vignette is produced around the edges of the screen rather than a photo’s entire background being blurred. The resulting fuzziness draws your attention to the subject.

Additionally, Google’s Snapseed (Free) has long been regarded as a trustworthy tool for this use. It makes sense why people consider it to be among the best photo editing apps for the iPhone and iPad. Let’s look at how it works:
1. Launch the Snapseed app on your iPhone and tap the “plus” icon to bring up your photo library. You can now choose to snap a photo, open an image from your device, or open the previous picture. You can also browse through your photo library to find the picture you want to edit.
2. Next, move to the “Tools” tab at the bottom and select the “Lens Blur” tool.
3. Next up, you should see a couple of white circles on your image. The area outside the inner circle will be blurry, but the area inside will be sharply focused. In the space between the two circles, your image will change from being sharp to being blurry. You can move the circle to a desired location or even resize it by pinching it with your fingers, depending on your needs.
- If you want to adjust the blur strength, swipe up or down and choose “Blur Strength“. After that, swipe left or right to adjust the blur’s intensity.
- You also have the option to adjust the “Transition” and “Vignette Strength” in the same way. The Vignette Strength lets you control how dark the edges of the image appear, while Transition lets you alter how the focused area transitions to blur.
4. Once you have perfectly edited your image, hit the checkmark at the bottom-right corner of the screen.
5. Now, tap “Export” and choose the Save a Copy, Save, or Export option in the menu, and you are done!
You May Also Like: How Big Is A 4 by 6 Photo?
FAQs
Is There a Blur Tool on IPhone Photos?
If you take a picture in Portrait mode, open it in the Open the Photos app, choose Edit, and then click the f button in the upper left corner. Use the slider to change the blur effect.
How Do I Edit a Picture on My iPhone?
- To view a photo or video in full screen in Photos, tap its thumbnail.
- To view editing options for effects like exposure, brilliance, highlights, and shadows, tap Edit and then swipe left beneath the image.
- When you have selected the effect you want to edit, drag the slider to make fine adjustments.
Final Words on Blur A Photo On iPhone
On your iPhone, you can create the blur effect you want using a variety of methods and apps. Furthermore, everyone has a unique set of benefits and drawbacks.
An app that creates a blurred background for photos can easily blur certain parts of a picture and produce the ideal bokeh effect. However, the bokeh effect is only available for portrait shots when using the iPhone’s default blurring options.
Read More: