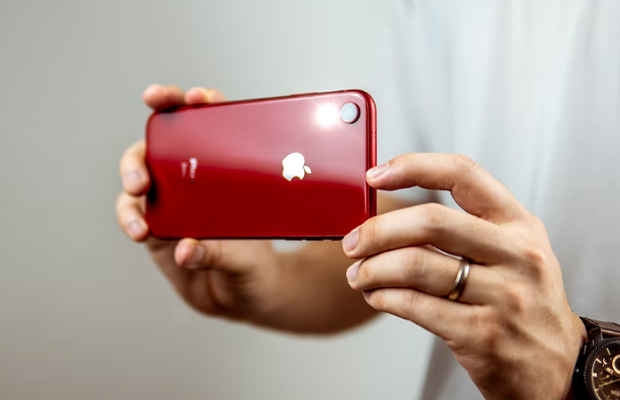
The camera lens on your iPhone will probably suffer the most if it falls into the water. Then the question comes: how to get water out of iPhone camera? Don’t worry, we will help you solve the problems!
If the battery is removable, take the phone apart and clean the internal parts. If not, take the phone, shake out the water, and clean the body.
If you are using any of the iPhone models before the iPhone 7, then you must know that your device does not have an IP67 rating. And that implies that it is not water resistant.
Continue reading to learn about five simple methods you can use. Let’s get going!
Table of Contents
How to Get Water Out of iPhone Camera? 5 Ways
Use the following hacks to extract water from the iPhone:
Strategy 1: Remove the Battery
You have to cut its power by removing the battery instantly. You probably want to quickly see if the phone is functioning properly, but resist the urge for a while. But turning it on will probably short the circuits.
Take your phone to a repair shop if you are unable to disassemble it yourself. Put it back together after disassembling it and set it down so the camera lens is facing up.
Placing your phone at an angle where sunlight is shining the brightest will be beneficial. However, we advise against placing it in direct sunlight.
After a while, leave it alone and check back in a few hours.
Strategy 2: Put It in Rice
It’s likely that you’ve heard this expression used frequently in conversations or even on social media. Well, as funny as it might sound, it does actually work!
Putting your iPhone camera in rice is akin to giving your phone first aid if you’ve just realized that there is moisture there, or anywhere else for that matter.
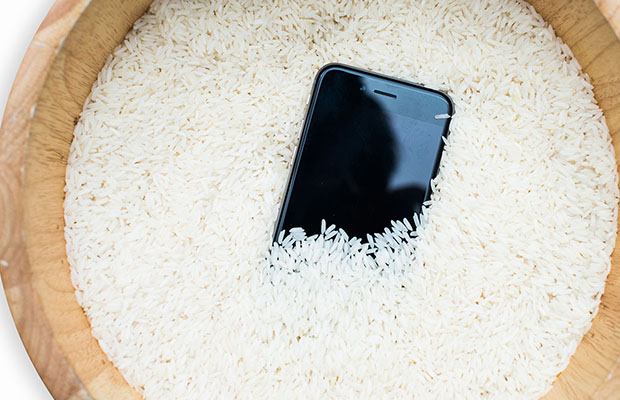
Get a sack of uncooked rice (or pour some quantity in a plastic container). Make sure that the entire phone is buried in the rice before placing it inside. Leave it there for 24 hours and check back for any improvement.
The rice removes the water from the camera lens and any other potentially affected parts of your iPhone by soaking up the moisture.
Give it another 24 hours if the moisture is still present after the first 24. Consider trying the next step if there is still no improvement.
PS: Be sure to turn off your phone if it didn’t shut off by itself before starting this exercise.
Strategy 3: Use Silica Gel
Although rice is also efficient, it might get dust or whole grains inside the port. Another equally effective method is to use silica gel.
Small packets of this gel must have been present in new handbags and shoe boxes. These tiny silica gel packs can completely remove all moisture from your shoes, bags, and clothing while leaving no humidity behind. They are always placed once production of the item is complete by manufacturers in part because of this.
In case you don’t have a silica gel pack lying around, you can easily purchase from Amazon, art stores, and nearby department stores.
Following is the method to use silica gel to wick moisture from your iPhone camera:
- Place some silica gel granules near the camera lens so it draws the water from there
- Use silica gel as you use rice, i.e., place it in a sealed bag where you can leave the phone for hours
- If the moisture is too much, consider leaving it in a warm area for a few days, so it dries thoroughly
If you break open the silica packs, this method is very effective. The silica gel beads could pop, though, making it slightly risky.
When drying the iPhone camera, silica gel makes less mess than rice. But you should give your iPhone at least 48 hours to completely dry out.
Additionally, you should choose other desiccant materials if silica gel access is difficult or you have children or pets in the house.
Strategy 4: Clean With a Microfiber Cloth
Count yourself fortunate if the water doesn’t seep deeply inside the camera. A simple exterior cleaning will save the day.
A fogged camera lens can occasionally be mistaken for moisture inside the lens. Most of the time, water is on the exterior and not trapped within. This is advantageous because it makes it simpler to clean a camera’s outside.
You can also use microfiber cloth to clean the back and front lens of your iPhone. Make sure you have cleaned the surface of any dust and debris. Check the camera after you’re finished to make sure you can take a clear picture.
It means moisture has gotten inside the camera if you can still feel the fuzz. You have to use a different strategy for such a situation.
Strategy 5: Take iPhone to a Repair Shop
You might ask “why not just take it to the repair shop once you observe the moisture in the camera lens?” well because the earlier tips we gave are usually effective and are a lot more economical.
However, are you able to pay the repair bill without any difficulty at all? If the answer is yes, you can skip the first few steps and take the vehicle right to the repair facility.
Also, have you tried the earlier steps and haven’t gotten the moisture out? If so, this may be your last option.
However, make sure you take it to a trusted repair shop so that you are guaranteed to get professional services.
We would advise you to go to an Apple Store, though they will typically try to upsell you on the newest iPhone, hehe.
In any case, a repairman ought to be able to remove the moisture from your iPhone’s camera lens so that you can resume taking truly outstanding pictures.
Also Read:
Signs of Water Damage on a Phone
Remove the phone’s casing and look at the water damage indicator to see if a phone has water damage. The water damage indicator is a white dot that can sometimes be found on the battery and is typically found behind the battery panel on the phone itself.
It is not water-damaged if the indicator is still white. The likelihood of water damage on the phone increases if the indicator is discolored or appears red. If the phone’s battery cannot be removed, use Google to find the location of the water damage indicator.
How to Prevent Water Seepage in the iPhone?
Your iPhone won’t get wet if you take a few precautions. Emergency kits and waterproof cases are two popular techniques used today.
The latter allows you to use the iPhone even in baths and pools. Meanwhile, the emergency package helps to dry the electronic device.
An emergency kit must always be carried by you. This saves you the trouble to opt for uncertain strategies.
On Amazon or in department stores, you can find some excellent emergency drying packs. Find out which kits are the best to purchase by asking your local iPhone retailer or a tech-savvy friend.
More iPhone Guide:
FAQs
How Do You Defog a Camera Lens?
Take the already fogged camera to a car or home and turn on the heater to defog the lens. Continually adjust the position of the camera lens while it is near the heater. Put the blow-dryer over the top of the camera’s lens if the heat source is a blow-dryer, and move it around the lens. The lens may be harmed if heat is kept concentrated in one area.
Can Water Damage Your iPhone Camera?
The iPhone camera might stop working completely if liquid comes in contact with the camera. A water-damaged iPhone frequently takes blurry pictures, even when the camera is functional. This occurs when water or the ensuing residue that remains after it evaporates obstructs the lens.
Final Thoughts
It hurts a lot when your iPhone camera is destroyed by water. Your phone may be fully functional, with the exception of the camera.
It’s challenging to open the iPhone and get to the battery, making moisture removal challenging. Another option is to try putting the phone in a bag of rice to help it dry out.
Most situations benefit from the tried-and-true hacks on the list above. In the event that your iPhone camera suddenly starts to leak water, it is therefore best to save this blog.