The different print sizes may be a little confusing to you if you’re new to photo printing. However, one that you’ll frequently encounter and should be familiar with is 4×6 – which is the most widely used in the sector.
Are you trying to figure out the size of a 4×6 photo? How big is a 4 by 6 photo? 4×6 prints are approximately 4 inches by 6 inches, or 4″ x 5 ⅞” (10 x 15cm / 101.6 x 152.4 mm).
Everything you need to know about the 4×6 photo size is covered in this article. You will discover its history, as well as hints for maximizing the effectiveness of your prints.
Table of Contents
- The Origins Of The 4×6 Print Size
- How Big Is A 4×6 Photo In Centimeters?
- How Big Is A 4×6 Photo In Millimeters?
- How Big Is A 4×6 Photo In Pixels?
- Aspect Ratio Of A 4×6 Photo
- What Resolution Should I Use To Print 4×6 Photos?
- The Problem With 4×6 Photos
- How To Change The Aspect Ratio Of Photo?
- What You Should Know When Printing Photos
- Tips For Shooting, Cropping, And Printing In 4×6 Photos
- FAQs
- Final Words
The Origins Of The 4×6 Print Size
You might ask yourself, “Why is the 4×6 photo size the default?” The background of photography and printing contains the answer to this query.
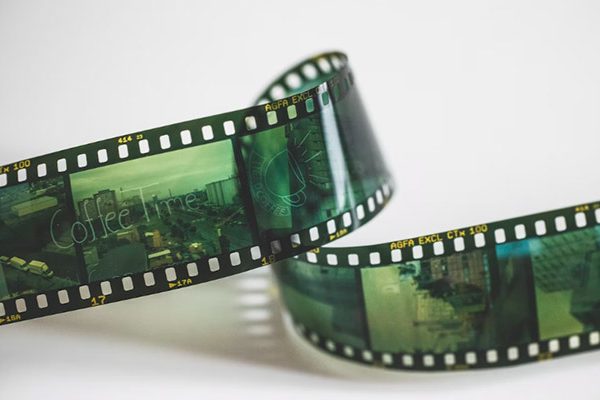
In the beginning, 35mm film was used in the majority of cameras, and film photography was the most popular style. 35mm film produced negatives with a width-to-height ratio of 3:2.
This aspect ratio was later adopted by many digital camera manufacturers for their camera sensors. The 3:2 aspect ratio of the 4×6 image is the same as that of 35mm film, as well as APS-C and Full Frame digital sensors.

How Big Is A 4×6 Photo In Centimeters?
Another metric unit that is typically used to measure short distances is the centimeter.
1 Every inch is 2.56 centimeters.
So, in centimeters, the 4×6 format is 10.16 x 15.24 cm (10×15).
Read More: How Big is a Wallet Size Photo?
How Big Is A 4×6 Photo In Millimeters?
101.6 x 152.4 mm
A measurement of one inch is 25.4 millimeters. To convert a 4×6 photo’s size from inches to millimeters, multiply 4 inches by 25.4 to get 101.6 millimeters in width and 6 inches by 25.4 to get 152.4 millimeters in height.
Related:
How Big Is A 4×6 Photo In Pixels?
Digital images or graphics that are displayed on digital screens are measured in pixels, which are the smallest units of measurement. A 4×6 photo’s pixel size varies depending on the image resolution.
- At screen resolution (72ppi) – 432 x 288 pixels
- At medium resolution (150ppi) – 1200 x 900 pixels
- At high resolution (300ppi) – 1800 x 1200 pixels
Aspect Ratio Of A 4×6 Photo
The aspect ratio or ratio is the term used to describe the shape of a photograph.
Unlike a photo taken with your smartphone, which is likely to have a 4:3 aspect ratio, a 4×6 photo has an aspect ratio of 3:2. For further explanation on this, see our article on 4:3 vs. 16:9.
What Resolution Should I Use To Print 4×6 Photos?
Resolutions are arguably the most important factor to take into account if you want to print your photos with the best results possible. Though you can get away with a lower resolution in some circumstances, it would be best to take into account where people will see your image.
In general, 1200×1800 (or 1200×1788) is the minimum resolution that is advised for 4×6 prints because it will produce 300dpi (dots per inch). Photos taken with a 0.8-megapixel camera or with a resolution of 1024×768 will also yield good results.
However, if you have a low-resolution photo, an image size of about 480×640 will be sufficient at 115dpi; however, generally speaking, going lower than that is pushing the envelope.
You can get away with using resolution at the low end of the scale if people will be viewing your image from a distance. However, for images that people will hold in their hands and/or view up close (as they usually do with a print of this size), you should use a higher resolution.
In general, higher resolutions will enhance the quality of your print to a certain extent, while lower resolutions will have a negative effect on your photo print by resulting in blocky, pixelated results.
Read More: Why is My Camera Shaking?
The Problem With 4×6 Photos
4×6 photos are common for good reasons; they’re cheap and small enough for most applications.
However, printing photos that big has a common drawback.
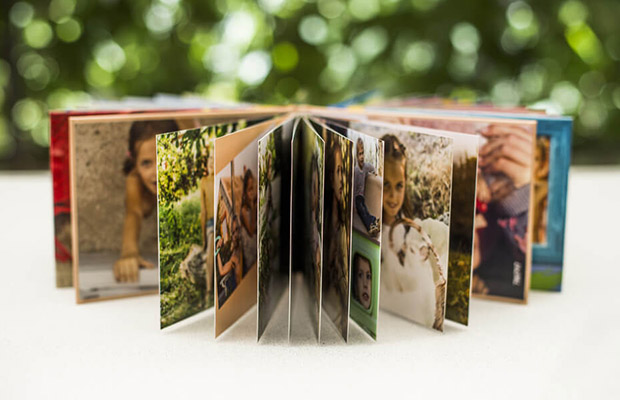
Due to its convenience, the majority of printing services favor the 4 by 6 format.
It’s possible that the person taking your photo won’t let you know, but editors typically crop photos to remove 3mm from each edge before printing.
If the crucial components aren’t centered, this cropping issue around the edges can undermine or ruin your photographs.
Before printing a photo, make sure that the necessary details—like the outline of your face—are not too close to the edges.
It’s also a good idea to think about the aspect ratio if you’re using a smartphone. Otherwise, it might result in the cropping problem I just mentioned.
iPhones, in particular, only offer aspect ratios of 19:5.9, 16:9, 13:6, 10:7, and 4:3. Only the iPad Mini 6 is available with a 3:2 aspect ratio.
How To Change The Aspect Ratio Of Photo?
Before printing 4×6 photos, you must change your camera or smartphone’s aspect ratio to the 3×2 ratio if it has a 4×3 aspect ratio.
Instead of doing it in-camera, I advise changing the aspect ratio in post-processing. This will allow you to freely compose the image and edit its elements if you decide against using a specific aspect ratio.
To improve photos, a variety of editing programs are available. The industry standard applications are Adobe Lightroom and Photoshop, but many others have features that are comparable. The aspect ratio of any given photo can often be changed using editing software that is frequently included with cell phones.
Whatever program you use, when you select “Crop”, there should be a drop-down menu that asks you what aspect ratio you’d like to set the cropping tool to.
What You Should Know When Printing Photos
Almost all photo printers trim your image’s edges by an additional 3mm (roughly 0.12′′). The photo machine cuts your images as soon as they’ve been printed. it sure is not fun to receive your photos with some “head cut.”
And to make matters worse, when you upload your photos, the majority of photo printing companies don’t let you know this.
Make sure faces and other important objects aren’t too close to the edges of your photo when taking it, or use a different crop to make sure nothing is cut off, to keep this annoyance to a minimum.
Read More: How Much Does A Photo Booth Cost?
Tips For Shooting, Cropping, And Printing In 4×6 Photos
If you want to print 4×6, you can still maintain a high-quality image if you don’t use a 3:2 aspect ratio. You can accomplish this by doing the five things listed below.
1. Get The Photo Right In A Technical Sense
Everything else, including editing and resizing, is much simpler if the technical aspects of your photo are done correctly. In cases where blur cannot be avoided, use a slower shutter speed and mount your camera on a tripod.
Additionally, you ought to shoot in RAW because doing so will enable you to preserve more detail in your image.
2. How Does The Picture Appear On Your Computer Screen?
After you’ve finished editing your photo, you should take a closer look to make sure everything looks print-ready. It is a good idea to check the picture’s quality at 100%.
If your photo looks good at 100% on your computer screen, there shouldn’t be any unpleasant surprises when you get the printed version. Zooming out on a photo on a computer screen can sometimes be misleading because blur and other flaws are harder to see at smaller sizes.
3. Use Photo Editing Software For Cropping
Use photo editing software to crop your photo before printing it at 4×6. The equipment you use doesn’t really matter; programs like Adobe Lightroom, Photoshop, and Capture One all have the features you need to get your photo ready. Cropping tools are available in even mobile apps.
Crop tools frequently include an aspect ratio locking feature that enables you to resize the crop box while maintaining a 3:2 ratio.
You can ensure that the composition of your final image is exactly what you want by cropping the image yourself.
Pixels per inch are another factor to take into account; for the majority of applications, a resolution of 300 to 500 PPI is sufficient.
4. Keep Important Photo Aspects Closer To The Center
As we previously mentioned, some cameras require image cropping. You run the risk of not getting the best 4×6 printing result if you place important picture elements close to the edges.
When possible, try to keep the focal point of your photo as close to the center as possible. To do this, you can step back, but a wider-angle lens will also work.
5. Consider Paper Quality
While there are some general rules for printing 4×6 photos, they will vary depending on the paper you select. You should use a higher resolution if you plan to print on higher-quality paper.
If your resolution isn’t as high as advised, using lower-quality paper might not make much of a difference.
Read More:
FAQs
What is 4×6 Photo Size in cm?
4×6 prints are approximately 10 x 15cm.
What About 5×7 Photo Size?
5×7 prints are approximately 5 inches by 7 inches (13 x 18cm / 127 x 178 mm). The sizes are expressed as length times height, so 5 times 7 is for portrait (vertical) orientation photos and 5 times 7 is for landscape (horizontal) orientation photos.
Final Words
4×6 printing size is a great format for many purposes. They can be easily stored and displayed because they are neither too big nor too small. You will receive prints of incredible quality if you print them at the appropriate resolution and aspect ratio.
When it comes to printing 4×6 images, you have a lot of options. By getting the technical details right, you can reduce your workload significantly and your camera will frequently capture images with the proper aspect ratio.
After reading this guide, you can begin transferring your creations to 4 x 6 pieces of photo paper.
You may also like: How To Add White Background To A Photo?

